Adding a backup camera to a 2006 Toyota Tundra
I have been driving a 2006 Toyota Tundra for several years. The truck has been reliable and comfortable...except for trying to back out of some parking spaces. I have the double cab (DC) model and it is long. Turning radius is also poor. To assist me, I decided to add a backup camera. Most newer vehicles come with one already, but I plan to continue driving the truck, and adding a backup camera seemed like a good idea.
Some research suggested that the license plate mount versions had a poor viewing angle. Several newer trucks have the camera positioned beside the tailgate handle. The 2006 Tundra does not have room to position a camera beside the lock in the handle, but below the tailgate handle seemed like the best place. I failed to take a picture of the tailgate before any modifications, but the handle is the widest part. The lock cylinder is below the handle with an empty space for your hand beside it.
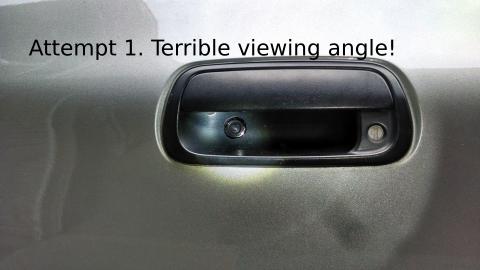
My first idea was to mount the camera inside the tailgate with only the lens exposed. Aesthetically this was great. For the view angle, this was terrible! I used some basic flat stock aluminum to creat a mount inside the tailgate and connected the camera. The result looked good from outside the truck (very well concealed), but offerred very poor visibility.
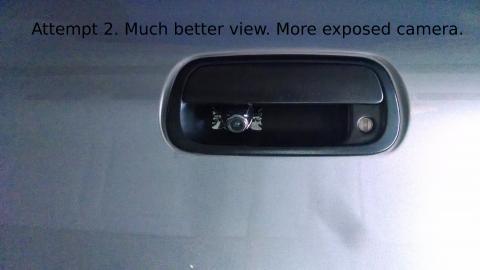
The second attempt was to mount the camera on the outside of the plastic below the tailgate handle and point the camera down toward the ground. This gave a much better view angle. I used more aluminum flat stock to put inside the tailgate and secure the camera. I used small bolts, nuts, and washers (or this may have everything). After application of some silicon, everything was sealed up and ready to go.
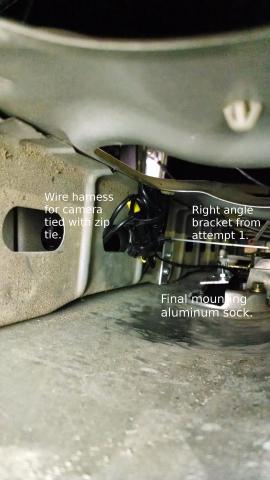
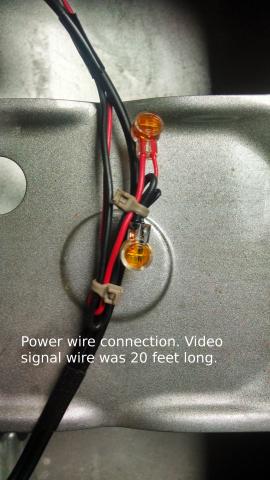
The power and video wires were run out the bottom of the tailgate and into a hole under the bed of the truck. I wrapped the wiring in plastic loom and then wrapped the loom with electrical tape. The camera came with short power wires that I used Scotch Snap-Lock connectors (water-proof) to connect to longer wires (18ga) for the power.
Check out the next post for details on mounting the video monitor, connecting the power, and next steps.